Monthly Archives: July 2013

Miniature Meals

IMG_4520

No, you’re not seeing wrong.  That’s a very mini hamburger that could fit in the palm of your hand. Actually, it could fit in the palm of your baby’s hand.

IMG_4515

On Monday I decided to try out a crazy Japanese snack kit that I bought at one of the asian supermarkets in town. Originally I thought I was just buying a box of hamburger shaped candy. However, upon further inspection it turned out to be a DIY mini hamburger kit of sorts and with no candy in sight.

The kit comes with a whole load of powder filled packets and some mixing trays and utensils. How fun is that?! All you need is some water and a microwave to cook your very own mini hamburger, fries, and cola. A whole meal that will fit in the palm of your hand. Really! Ok, so it’s not exactly a meal, maybe a meal if you were the size of a hamster but still…it was fun.

I’ll just show you a bit of what I did so you can get the gist of it but mainly I just wanted to post it cause they’re so  darn   cute.

IMG_4417

IMG_4423

IMG_4429 IMG_4430 IMG_4434 IMG_4435

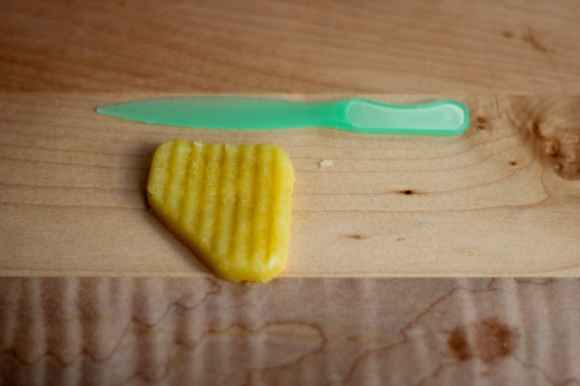
From the pictures you can see the fries being made. Essentially, all I had to do was mix the fry powder with a certain amount of water, mix it up, press it down into the ridged container, microwave it, and slice it into itty bitty little fries. Yes, they are adorable and surprisingly tasted a little bit like fries.

IMG_4441

Next, I made the hamburger buns, patty, and cheese. Yes, you even make the cheese. There’s real cheese powder in there. So weird. So cool.

IMG_4455

Want to know what else? The cola fizzes!

IMG_4467

IMG_4506

IMG_4460

IMG_4536

So, was all the work worth it for the taste? Was it delicious?

Absolutely not.

Though, I wasn’t expecting it to taste good. I mean, come on. Making food out of powder in your microwave? Also, in general, I find that western food created by asian companies always tastes strange. The bun for one was really sweet, the ketchup that I made was severely artificial, and don’t even get me started with the patty.

I managed to eat one and that was enough. But, overall it was totally worth it for the fun of making it. Now I just need to get my hands on their ramen making kit and I’m all set.

Tagged , , , , , , , , , , ,

Perfect Pie

IMG_4374

It’s pie season!

There’s just something so homey and comforting about pies. I don’t know what it is. It’s not like I even grew up eating pies at home because my mother never wanted to bother with making something as fiddly as a pie. The only time I remember having a homemade pie when I was a kid was when my father and I tried to bake an apple pie together. I think it probably took us about 5 hours to just get it into the oven. Then of course, we never baked it properly and it ended up swimming in a pool of apple liquid.

Then, years later I tried my hand again at making pies but this time alone. You’d think that something like a pie, with just fruits and flour wouldn’t be so difficult… but that dough! The one you’re not supposed to over work for fear of a chewy, tough crust but instead gently pat and roll into shape, only to have it crumble on you while transferring it to the dish. I’m not sure I’ve ever been so frustrated by a dessert in my life.

Luckily, I’ve improved on my pie making skills and happen to have the perfect recipe for delicious, flakey, melt in your mouth crust that uses only 2 ingredients (not including water). Just salted butter, and plain flour. Nothing else. The technique however is a little different than your regular pie crust and comes from Pim Techamuanvivit at Chez Pim. It involves a bit of work, but nothing too hard to accomplish and also results in a VERY easy to handle dough that will in no way break on you while transferring it to the dish. And for that, I am thankful.

IMG_4245

Since I have so much rhubarb growing in my backyard it only makes sense to make a pie with rhubarb. Though, unfortunately a pie with only rhubarb would either be way too tart or need way too much sugar and that’s just not my kind of thing. Luckily, it’s also strawberry season and the perfect time for delicious Ontario strawberries.

IMG_4352

Strawberry Rhubarb Pie with Salted Butter Crust
Makes 1 9″ lattice topped pie

First make the pie crust following this recipe.

3 1/2 cups rhubarb cut into 1cm pieces
3 1/2 cups hulled, and quartered strawberries
1/2 cup of coconut sugar
1/2 cup of golden sugar
2 tsp vanilla extract
2 tbsp all purpose flour
pinch of salt

1 egg beaten with a tablespoon of water
turbinado or coarse raw sugar for sprinkling

Preheat oven to 350˚F.

Combine filling ingredients in a large bowl and toss gently.

Lightly flour your work surface and roll out half the dough until it is slightly larger than your pie dish. Transfer to the pie dish. Roll out the second piece of dough slightly larger than the pie dish and cut out 14 1cm wide strips. Add filling to the dish and gently arrange the strips in a lattice pattern so that the strips weave in and out of one another. Trim off any excess dough from the sides and crimp the edges with your fingers. Using a pastry brush, lightly brush the egg wash over the crust. Now, with any extra dough left over, roll it out and cut out two or three leaf shapes and place them in the middle of the pie as decoration. Brush these with egg wash as well. Finally, sprinkle the pie with coarse sugar and place on a baking tray. Bake for about an hour or until the filling is bubbling and thickened. Let cool completely before slicing.

Tagged , , , , , , , , , ,

Summer Sweet Fry Salad

IMG_4287

Lately I’ve been noticing how expensive it is to go out and eat. Here in Toronto it seems to be common place that a regular salad will cost you anywhere from $9 for a plain garden salad all the way up to $20 for a “fancy” one. Really? $20 for some lettuce, tomatoes, cucumbers, cheese, and maybe some sort of protein. It’s really quite amazing how much food is marked up in restaurants compared to how much you can make it for at home. But, I’m not really complaining since I do know how much labour costs and everything else that goes into running a restaurant costs. After all, you’re not really just paying for the food when you go to a restaurant. There’s the service, ambiance, experience, etc.

However, just yesterday I went for afternoon tea with my sister in one of the “high end” areas of Toronto. I put high end in quotes because I really just think all the people that frequent those places just like to pretend they’re high end and better than everyone else. They’re not.

Anyway, my point is, I’ve been for afternoon tea a few times before at a bunch of different tea rooms and I’d say that this was one of my worst experiences. You’d think that $100 would get you some nicely prepared sandwiches, some properly brewed tea, and hopefully some really great service. Unfortunately, the service and the quality of the food was incredibly similar to the whole vibe I get from that area in general.

IMG_4280

So, back to salad.

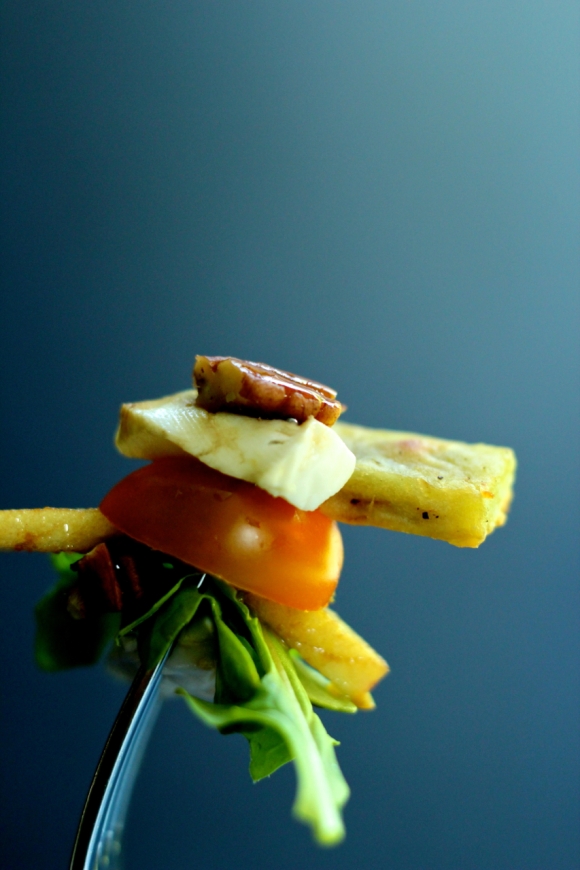
I don’t have much of a recipe today but this is just a salad that I like to eat when I want something filling with lots of different textures, flavours, and colours. It’s a really good meal for a hot summer day when the thought of eating hot food makes you break into a sweat. I never really make it the same way every time but I try to keep a few main ingredients such as sweet potatoes, pecans, and apples in there and then add whatever else I have on hand at the time.

IMG_4296

Sweet Potato, Apple, and Pecan salad
Makes 1 large salad (approximately)

About 2 cups of mixed lettuce greens (spring mix)
Sweet potato fries (recipe below)
1/4 cup toasted pecans, chopped
1/2 a medium apple (something crisp such as a honey crisp works well), sliced
small handful of bocconcini cheese or about 2 tbsp of goat’s cheese, chopped or crumbled
about 5 cherry tomatoes, halved
good aged balsamic vinegar, about 2 tbsp
extra virgin olive oil, about 1 tbsp

First prepare the sweet potato fries. Lay out the greens on a plate and top with fries, apples, etc. drizzle with balsamic vinegar and olive oil or top with your favourite dressing. I like this Wild Ginger one from Fresh Restaurants.

Note: this is just a rough recipe and the amounts aren’t exact. Feel free to add more, less, or omit or add ingredients.

Sweet potato fries
1/2 medium caribbean sweet potato (the one with a reddish skin and yellow/white on the inside)
1 tbsp cold pressed coconut oil or any other high heat cooking oil
salt and pepper to taste

Preheat the oven to 425˚F. Line a baking tray with parchment paper. Wash and cut the sweet potato into about 1cm x 1cm x 10cm pieces. Melt the coconut oil in a large bowl and toss the fries in the oil. Lay out evenly onto the tray and bake for 15 minutes and then flip the fries and bake for about another 15 minutes or until golden.

Tagged , , , , , , , , ,