Yes! We finally got around to making german pretzels. I had been waiting a long time to do this and I’m glad that we did. Last Sunday Christoph and I made it a plan to make Laugenbrezeln, traditional German pretzels, made with lye. The only problem was that we didn’t have the lye and therefore they weren’t authentic. But since Christoph is German I guess you can still call these pretzels German…sort of. Though, I guess you could also call them Chinese pretzels since I’m Chinese. German/Chinese pretzels? Chinman pretzels? Germese pretzels? Nevermind.
Instead of the lye we used a baking soda bath to simmer the pretzels in before they were sprinkled with pretzel salt. Which by the way, is pretty much impossible to find in Toronto and instead we resorted to buying a frozen pack of New York style pretzels at the local FreshCo. and took the pack of pretzel salt from there. I really wanted that salt. If I could have somehow acquired the lye in a similar fashion I would have done it but no luck, food grade lye isn’t easy to come by in Canada and now that I think about it it probably wouldn’t have been a good idea for me to use it. Caustic solutions don’t go well with my skin or any person’s skin for that matter.
First, make the dough. It’s a stiff dough so it’s best to knead by hand. 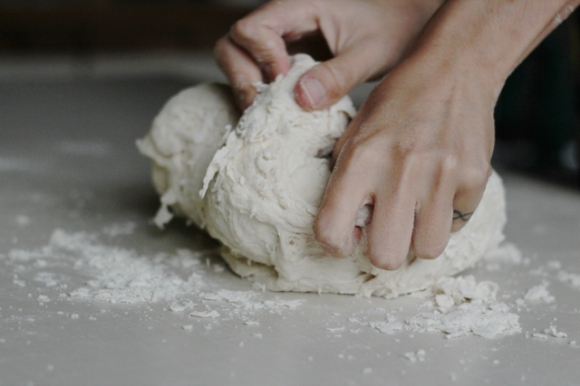
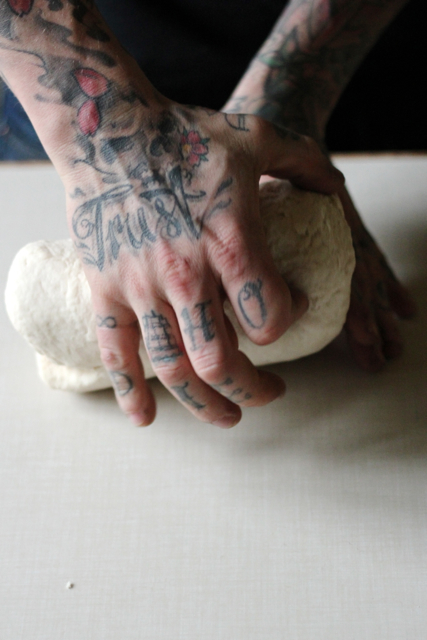
Then pass it to your partner, if you have one, so they can do some of the work,
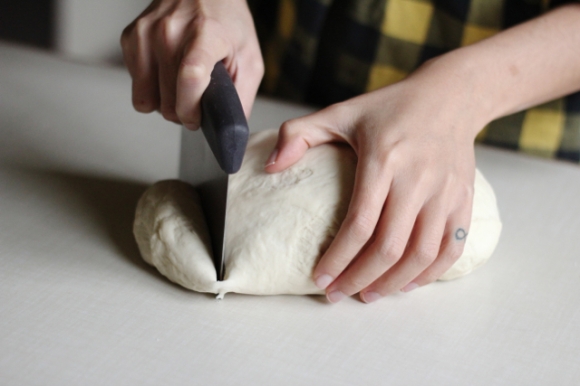
portion the dough into 12 equal pieces,
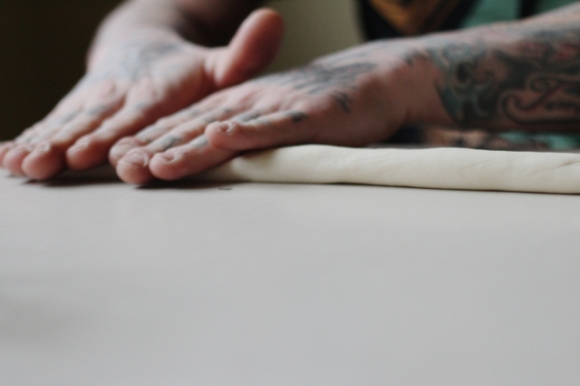
let the dough rest for 5 minutes

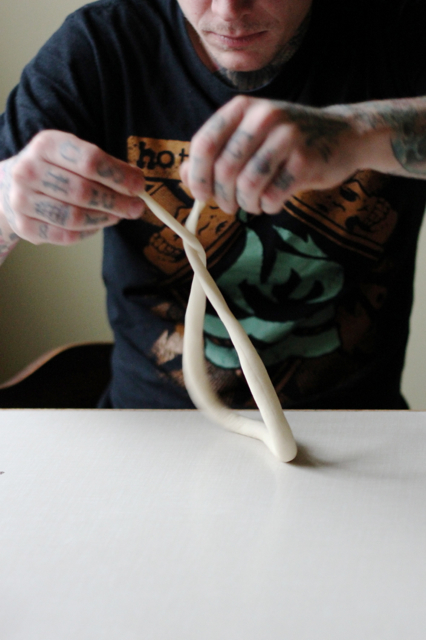
roll into 22 inch long ropes, making the ends skinnier,
twist,
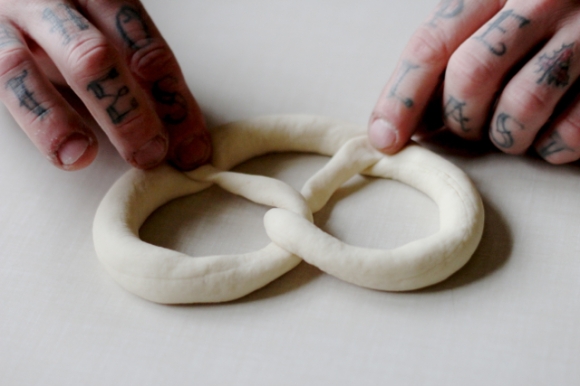
shape,
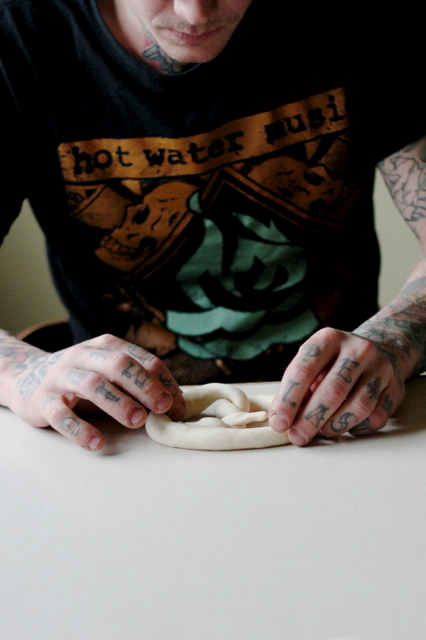
and press ends.
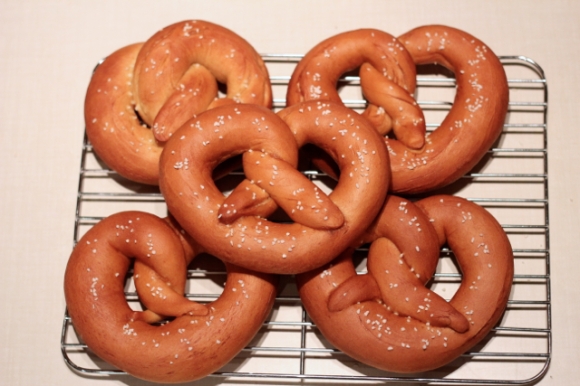
We then had to let our pretzels rest for an hour outside in the cold since we didn’t have enough room in our fridge. Make sure no squirrels or other furry animals run off with your dough! Once a skin had formed we simmered the pretzels one by one in a baking soda solution and sprinkled with pretzel salt and baked them for 15 minutes.
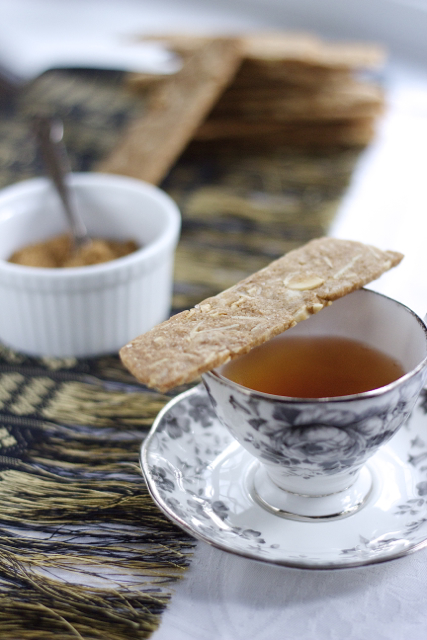
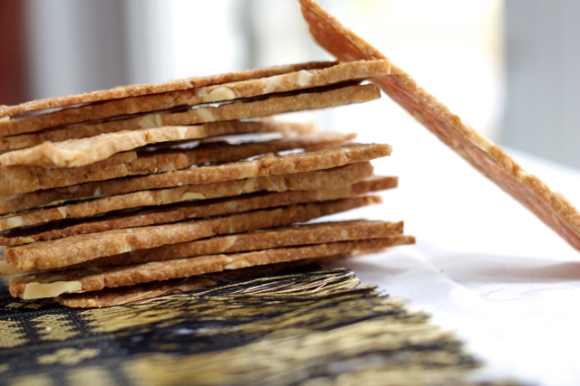
Pretzels, finally!
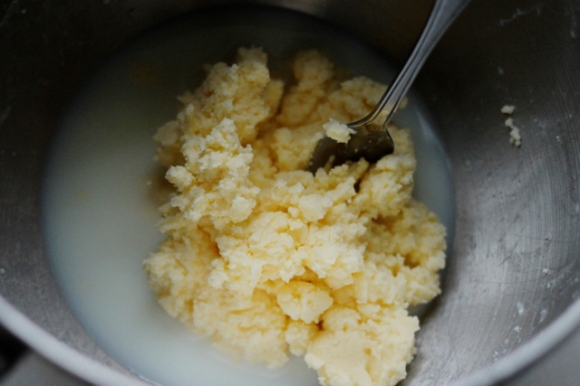
So, what is that picture of that yellow lumpy stuff at the top? It’s cultured butter actually. Yes, I made butter and it was easy. I’ve been wanting to make cultured butter for a while now and never knew where to buy good cream. The cream we get at the grocery store happens to have additives such as carrageenan, gums, colours, and a whole bunch of other nasty stuff. This wouldn’t do for my butter so I ended up at the health food store in Kensington Market where I picked up a few cartons of Hewitt’s 35% whipping cream. Pure cream. The other addition to this butter was yoghurt which you add to the cream and let it sit in a warm place for 12-18 hours. This time allows the good bacteria in the yoghurt to grow and essentially sour the cream. It sounds weird but I’ve been culturing foods for the past few months and it really is quite simple. The culturing gives the cream a slight tang which is exactly what you want to elevate the flavour of the cream. Next step is just to whip the cream until it breaks and the fat separates from the buttermilk. Mix it up a few times with cold water, salt it and you’ve got delicious, fresh, homemade cultured butter.
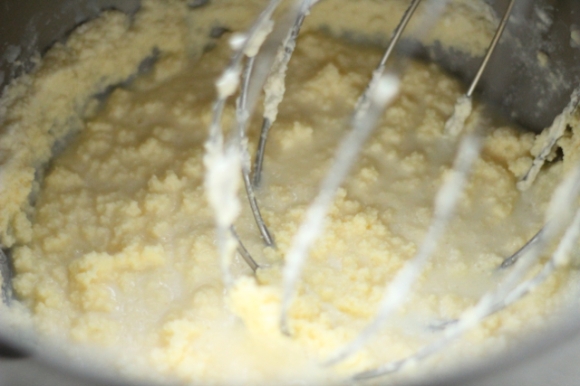
Starting to get grainy,
the whipped cream will split and look just as unappetizing as this,
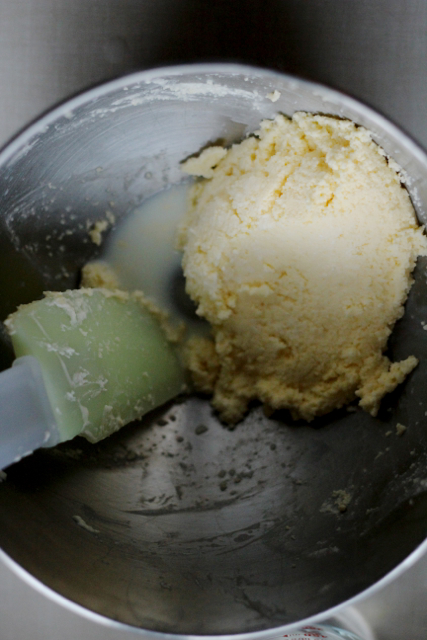
strain off the buttermilk and save it for another use, then wash the butter with ice cold water
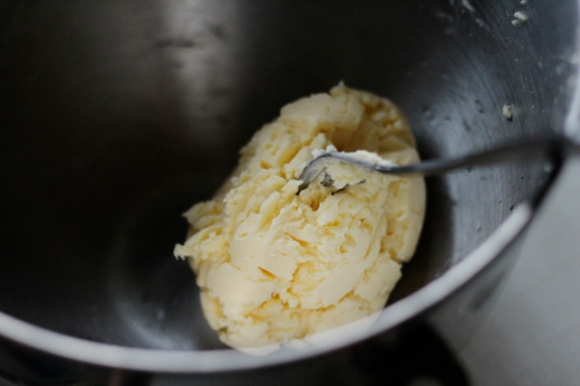
the butter will come together into one hard lump.
Then what do you do with the fresh pretzels? You slather them with as much cultured butter as you possibly can. It’s the holiday season after all and there’s really no point in watching your diet now. At least that’s what I tell myself to make myself feel better for all the butter and sugar I’ve been consuming over the past month…year…years.
German Pretzels (Soft Pretzels)
Makes 12 large pretzels
Adapted from this version by Luisa Weiss of The Wednesday Chef
2 tbsp butter or margarine (I used Becel Vegan margarine)
2 tbsp instant yeast
1 tbsp brown sugar
5 1/2 cups all purpose flour
1 tbsp vital wheat gluten
1 tbsp coarse sea salt
1/2 cup baking soda
Pretzel salt or coarse sea salt for sprinkling
Mix the yeast, sugar, and margarine in a large bowl with 2 cups of warm water. Add in half the flour and the wheat gluten and combine. Add in the salt and the rest of the flour minus 1/2 cup of the flour. The amount of flour you will need depends on the humidity of your kitchen. You may need more, you may need less. The dough I made ended up being a little too stiff and dry so I recommend using less at first. Knead for about 10 minutes until the dough is smooth. Cut into 12 portions. I used a scale to get my pieces equal in weight. Let the dough rest for 5 minutes, covered with a tea towel.
Next, roll the dough into 22 inch long ropes, wetting your hands if the dough is too dry to roll. I would recommend rolling the dough out longer than 22 inches. Shape into a pretzel shape and press the ends down to stick to the dough. Let rest for 30 minutes uncovered at room temperature then 1 hour below 4˚C. I set them outside since I had no room in my refrigerator.
Bring a large pot filled with 1.5 litres of water to a simmer and add the baking soda. Be careful as the baking soda tends to sputter.
Preheat the oven to 425˚F.
Carefully drop one pretzel at a time into the baking soda bath and simmer gently on each side for about 10 seconds. Remove with a slotted spoon or spatula and place onto a parchment lined baking sheet. Sprinkle with pretzel salt. Once you have simmered and salted 4 of the pretzels, place into the preheated oven and bake for about 15 minutes or until the pretzels are a rich dark brown colour. Transfer to a cooling rack and eat slathered with butter and spicy mustard while still warm.
Cultured Butter
Makes about 1 cup of tangy salted butter
Adapted from this recipe from the Traveler’s Lunchbox
500 mL of good quality heavy cream (35% fat or higher)
3 tbsp full fat good quality plain yoghurt
Ice cold water
Salt, to taste
First, combine the cream with the yoghurt in a glass or metal container. Cover with a piece of paper towel or a tea towel and let sit in a warm place for 12-20 hours. My batch took about 20 hours to get to where I wanted it. If you live in a warm region then this should only take about 12 hours. The cream will be slightly thicker and will smell like yoghurt and should taste slightly tangy. You can now refrigerate the cream until it’s cold, up to 24 hours if you will not be churning that day.
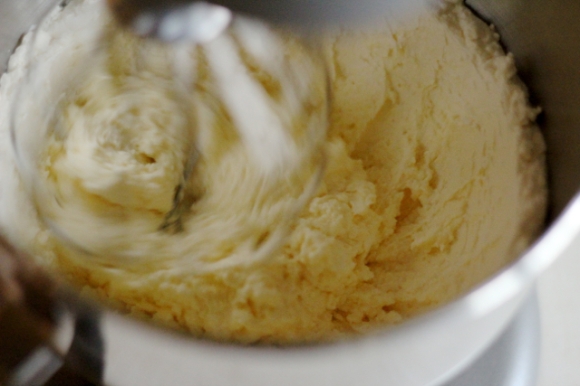
Either whip the chilled cream with a stand mixer, hand mixer, by hand if you feel like it, or with a real butter churner if you have one. Mix on medium speed until the cream holds stiff peaks. Turn the speed down to low and keep mixing until it starts to go lumpy and the fat separates from the buttermilk. Scrape down the sides and mix for another 10 seconds or so. Using a large spatula or slotted spoon, press the fat clumps to the side of the bowl and carefully drain off the buttermilk and save for another use. Keep pressing the butter to get the milk out and drain as much off as possible. Next, add some cold water to the butter and mix and knead the butter with a fork. The water will turn a milky colour, drain this off. Keep adding cold water to the butter while mixing, kneading, and draining until the water runs clear. Drain off all the water and knead the butter again to squeeze out any water inside the butter. The butter will now be quite hard and cold. I let it sit, covered, for about 2 hours until it softened up a bit. Then add your salt of choice to taste and scoop into a ramekin, roll into parchment, or shape into moulds.